


- Focus News
-
3 Making Modes of Metal-Bonded Diamond Grinding Wheels
How do I polish a granite edge
- Contact Us
-
Tel:0592-5099391
Fax:0592-5099319
ADD:Unit 2A, Lianchang Building, NO.6-8 Huli Avenue, Huli District,Xiamen,China.
www.stonediamondtool.com

- Details
-
INSTALLING A POLYASPARTIC FLOOR
Source:www.stonediamondtool.com Date:2018/10/30 Read:683
The first step is getting trained to do the installation properly. Flexmar, The Stamp Store, Advantage, and others offer training programs. "This is a critical step," said Flexmar's Jack Bracco. "It's not that installation is difficult, it's simply that we want people to employ a repeated process. Installers who have been using epoxy or polyurethane have their own way of doing things. We are trying to standardize the process to assure success."
Step 1
Installation of a polyaspartic floor starts with floor preparation to rid the surface of laitance and contaminants. This is critical to success. The low-viscosity material must be able to penetrate the surface. Acid etching is not recommended, since it adds moisture to the concrete and the lower pH can lead to delamination problems. Most providers recommend a diamond grind at a 60 to 80 grit-just enough to get through the paste surface layer and open the pores of the concrete.
The Stamp Store in Oklahoma City, OKStep 2
Cracks and joints can then be repaired. Bracco recommends filling the cracks with sand then wetting the sand with polyurea. Polyureas cure so rapidly that these repairs can be ground flush with the concrete surface in about 20 minutes. "The polyaspartic has such great elongation properties that you simply install the coating right over the top of these repaired cracks without getting any reflection" said Bannister. Advantage's Harms notes that this does not include contraction joints. "We don't fill the joint, we coat down into it and back out, because if you tie the joint, it can crack the slab at mid-panel." Polyaspartic is usually mixed with equal amounts of Part A and Part B.
The Stamp Store in Oklahoma City, OKStep 3
At this point, the floor can be acid stained or colored with acrylic water-based stains. It should be noted that prior to sealing, a test area should be stained and sealed to assure proper adhesion and chemical interaction between the top coating and the stain. The installer should be looking for any areas where the stain may be interfering with the coating, or once cured, where the coating may be delaminating due to the stain. The installer then rolls on the recommended number of coats of polyaspartic. This is when you can see whether the coating is wetting--absorbing into the concrete. Different providers recommend different thicknesses for this primer coat and the one or two subsequent coats of polyaspartic. Bracco and Bannister recommend a 2 to 3 mil thick primer coat, while Harms goes with a 10-mil coat. "Bonding comes from two things," said Bracco, the surface profile and the ability to flow into the substrate. With polyaspartics we have a little extra time before it cross links, so it has time to absorb into the concrete." The primer coat and bed coat typically contain pigmet.
Flexmar CoatingsStep 4
Within an hour (or less) the primer has cured enough to walk on. For applications that incorporate vinyl chips or quartz sand, the second coat is then put down. For applications with color, both of these first two coats incorporate pigment. For acid stained floors, Bannister recommends stopping at two coats of clear polyaspartic. For floors with vinyl chips or quartz, that material is immediately broadcast into this "bed" layer. This layer varies from 2 mils to 18 mils thick, with the vinyl chips adding as much as 8 mils. "The chips wet out to form a laminar layer parallel to floor," said Bracco. "The ability to wet those chips is very important. Epoxy has a much higher viscosity, so the chips tend to lay on edge. Polyaspartics wet out the chips and they lay down to give you the laminar effect that helps in the overall protection of the concrete."
Step 5
Once the bed coat has cured, Harms recommends scraping the surface. "We scrape it hard with a floor scraper to clean up the vinyl chips. That makes it smoother and also reduces the amount of product needed in the top coat to cover the vinyl chips." Workers then vacuum up all loose materials before rolling on the top coat. The top coat is always clear and goes on in a range of 6 to 18 mils. Thinner coats are applied with 3/8-inch nap rollers and thicker coats with ¾-inch naps. Thinner coats leave a slight texture to the surface as some of the vinyl chips or quartz pokes through. Vinyl chips are broadcast until saturation.
Flexmar CoatingsThis all results in final coating thicknesses from 11 to 40 mils. All of this can be accomplished in a single day. Typically, the new floor can be opened to foot traffic in 2 or 3 hours and can be driven on within 24 hours.

- News Reviews
- Popular Products
-
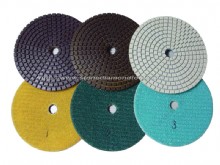
- 3 Step Polishing Pad (3SP_01)Clicks:64721
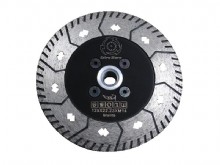
- CUTTING &GRINDING WHEELS (HN1Clicks:61912

- RCB resin copper bond polishinClicks:58214
- 3'' Metal Resin Transitional PClicks:34431
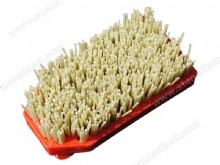
- Fickert Diamond Brush AB05DClicks:22080
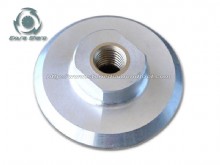
- Aluminium Backer Pad BP01Clicks:19921
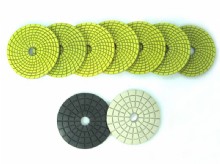
- Spiral yellow and green Wet PaClicks:19696
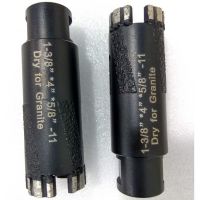
- Diamond wet dry core drill bitClicks:18878
- Products Categories
- Brazed Drill Bit Diamond Cutting Tools Diamond Saw Blade Diamond Small Blade Diamond Segment Diamond Wire Saw Electroplated Blade Multi Blades and Single Saws Diamond Polishing Tools Wet Polishing Pads Dry Polishing Pads Concrete Tooling Diamond Profile Wheel Polishing Drum wheel Abrasive Stone For Granite Abrasive Stone For Marble Backer Pads Grinding Discs Diamond Grinding Tools Sintered Cup Wheels Brazed cup wheels Profiling Router Bit Router Bits CNC Profile Wheels CNC Finger Bits Brazed Router Bits Diamond Core Drill Bit Diamond Core Drill Bit Vacuum Brazed Drill Bits Electroplated core bits Construction Core Drill Bit English drill and construstion Drill Dry Diamond Core Drill Bit Diamond Carving Tools Common Carving Tools High-speed Carving Tools Stone Profiler Machines Air Grinder Wet Grinder Angle Grinder Multi Function Wet Grinder Stone Router Machines Abrasive Brush Other Accessories Brush For Floor Series Diamond Brush Series Brush For Steel Wire Series Brush For Rutine Series Bush Hammer Plates Diamond Rollers The thick round Epoxy Floor Tools Microcement Tools STONE Product
- www.sssto.com | www.chinastonesuppliers.com | www.chinadiamondtool.com | www.chinatoolstore.com | diamond tools supply
- javascript:;
-
-
© 2009-2012 All rights reserved Support:www.zawl.cn
-