


- Focus News
-
3 Making Modes of Metal-Bonded Diamond Grinding Wheels
How do I polish a granite edge
- Contact Us
-
Tel:0592-5099391
Fax:0592-5099319
ADD:Unit 2A, Lianchang Building, NO.6-8 Huli Avenue, Huli District,Xiamen,China.
www.stonediamondtool.com

- Details
-
STEPS IN THE POLISHING PROCESS
Source:www.stonediamondtool.com Date:2019/5/29 Read:938
STEP 1: IDENTIFY THE CONDITION OF THE CONCRETE
If you plan to polish an existing concrete floor, you must first evaluate the condition of the surface you’re dealing with. Here’s what to look for:
• High or low spots
• Spalling at joints
• Minor cracks and blemishes
• Existing sealers, paints, or epoxy coatings
• Adhesives or mastics remaining after removal of floor coverings
Most coatings and minor surface imperfections can be removed by diamond grinding, as described in Step 2. However, if the floor exhibits major cracking and joint spalling, you may need to resort to other remedial methods.
STEP 2: PREPARE THE SURFACE
The first step in polishing concrete is to remove any existing sealers and coatings. If the floor has only minor blemishes or a very light coating, you can move on to initial rough grinding.
For thick elastomeric membranes, mastics, epoxies, and urethanes (about 8 to 20 mils), it will be necessary to go over the surface with coarse 16- or 20-grit diamond tooling or a more aggressive grinding head specifically designed for removing heavy coatings and mastics, such as the T-Rex™ from HTC Sweden AB (www.htcsweden.com). This tool achieves high removal rates, often completing the job after one pass.
At this stage you should also fill any cracks and control joints in the floor with an epoxy or other semi-rigid joint filler, making sure to level the filler at the surface. This will enable the polishing heads to move more easily over the floor.
STEP 3: BEGIN POLISHING
Now you’re ready for initial rough grinding of the concrete surface, which will prepare it for final smoothing. This is generally a three- to four-step process, depending on the condition of the concrete.
In most cases, you’ll start with a coarse 40-grit diamond segment bonded in a metallic matrix (see sidebar “How to Choose the Right Abrasive”). After a few passes over the surface with the 40 grit, repeat the process with the finer 80-grit and 150-grit metalbonded abrasives. (Some contractors like to continue up to a 300-grit grind.)
Each diamond grit step requires an average of two passes, depending on the density of the concrete. If the floor is in relatively good condition (clean, level, and blemishfree), you may be able to start the polishing process with an 80 or 150 grit.
STEP 4: DENSIFY THE CONCRETE
After performing initial coarse grinding with the metal-bonded diamond abrasives, it’s often beneficial to apply a liquid chemical hardener to the concrete to help solidify and densify the surface and provide extra protection from water penetration and staining. Hard concrete also produces a better polish.
Chemical hardeners are sold under different trade names, but are usually made of sodium-, potassium-, or lithium-based silicates. These products, which can be applied to new or existing floors, work by reacting chemically with the calcium hydroxide in the concrete to form a hard, crystalline structure.
Using a stiff-bristled broom, apply the hardener liberally to the work area, being sure to keep the surface saturated. Allow the hardener to penetrate into the surface for about 30 minutes, and then remove any excess using a squeegee or floor scrubber. Before proceeding to the next step, let the hardener cure for 12 to 24 hours, or as instructed on the container. Some hardener manufacturers recommend polishing shortly after the densification process.
STEP 5: FINAL POLISHING
You’re now ready to give the concrete surface a fine polish using diamond abrasives embedded in a resin matrix. Typically, this step will follow your last pass with the 150-grit metal-bonded abrasive.
Start by polishing with a 100-grit resin bond. Then switch to ever-finer grits (200, 400, 800, etc.) until the floor attains the desired sheen. For an extremely high-gloss finish, go up to a final grit of 3000.
With each successive pass, the goal is to buff out the scratch pattern from the previous pass (a process called lapping). As you gain more experience, you’ll know when to switch to the next-finer grit level by observing the floor surface and the amount of material being removed.
STEP 6: PROTECTING POLISHED CONCRETE
Once you obtain the look and polish you’re striving for, you may want to protect the surface by applying a commercial stain-guard product, especially if it will be exposed to grease, oil, or chemicals. Similar to Scotchgard for fabric, these solutions penetrate the surface to make the floor more resistant to stain absorption and dirt. They are usually applied by pump sprayer or wax applicator, but must be reapplied every few months or so to maintain their effectiveness.

- News Reviews
- Popular Products
-
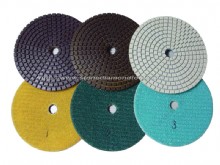
- 3 Step Polishing Pad (3SP_01)Clicks:64714
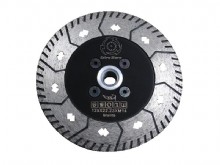
- CUTTING &GRINDING WHEELS (HN1Clicks:61907

- RCB resin copper bond polishinClicks:58209
- 3'' Metal Resin Transitional PClicks:34426
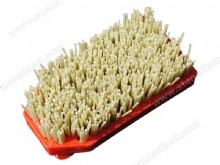
- Fickert Diamond Brush AB05DClicks:22070
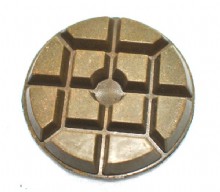
- Aluminium Backer Pad BP01Clicks:19914
- Spiral yellow and green Wet PaClicks:19690
- Diamond wet dry core drill bitClicks:18873
- Products Categories
- Brazed Drill Bit Diamond Cutting Tools Diamond Saw Blade Diamond Small Blade Diamond Segment Diamond Wire Saw Electroplated Blade Multi Blades and Single Saws Diamond Polishing Tools Wet Polishing Pads Dry Polishing Pads Concrete Tooling Diamond Profile Wheel Polishing Drum wheel Abrasive Stone For Granite Abrasive Stone For Marble Backer Pads Grinding Discs Diamond Grinding Tools Sintered Cup Wheels Brazed cup wheels Profiling Router Bit Router Bits CNC Profile Wheels CNC Finger Bits Brazed Router Bits Diamond Core Drill Bit Diamond Core Drill Bit Vacuum Brazed Drill Bits Electroplated core bits Construction Core Drill Bit English drill and construstion Drill Dry Diamond Core Drill Bit Diamond Carving Tools Common Carving Tools High-speed Carving Tools Stone Profiler Machines Air Grinder Wet Grinder Angle Grinder Multi Function Wet Grinder Stone Router Machines Abrasive Brush Other Accessories Brush For Floor Series Diamond Brush Series Brush For Steel Wire Series Brush For Rutine Series Bush Hammer Plates Diamond Rollers The thick round Epoxy Floor Tools Microcement Tools STONE Product
- www.sssto.com | www.chinastonesuppliers.com | www.chinadiamondtool.com | www.chinatoolstore.com | diamond tools supply
- javascript:;
-
-
© 2009-2012 All rights reserved Support:www.zawl.cn
-