


- Focus News
-
3 Making Modes of Metal-Bonded Diamond Grinding Wheels
How do I polish a granite edge
- Contact Us
-
Tel:0592-5099391
Fax:0592-5099319
ADD:Unit 2A, Lianchang Building, NO.6-8 Huli Avenue, Huli District,Xiamen,China.
www.stonediamondtool.com

- Details
-
HOW TO REMOVE MARBLE FLOORING
Source:www.stonediamondtool.com Date:2019/10/25 Read:586
By Joseph Lewitin
Materials and Preparations
Marble is a beautiful and elegant material for floors, but no building material lasts forever, and at some point when that marble floor is badly stained or cracked, you'll be faced with installing a new flooring material. When that time comes, you will have two options: Remove the old marble floor, or lay the new flooring material over the existing marble.
There's no way to sugar-coat this: Removing marble flooring is one of the hardest, most difficult jobs there is. If you have the option of installing the new floor over the old, that may be the better choice. Materials such as vinyl, cork, bamboo, laminates, and engineered hardwood are often available in click-together tiles and planks that can be installed directly over flat surface floors, saving you the cost and hassle of removing the marble.
If the marble flooring is in bad shape, or if it's not practical to lay new flooring over the old, then you'll have no choice but to remove the marble.
Tools and Materials
· Protective clothing (long-sleeved shirt and heavy trousers)
· Heavy work gloves
· Eye protection
· Hearing protectors
· Sledgehammer
· Maul or hammer
· Flooring scraper (if necessary)
· Aviation snips or tin snips (if necessary)
· Masonry chisel
· Blade-type paint scraper
· Medium- and heavy-grit sandpaper
· Floor-leveling compound (if necessary)
Diagnosing the Floor
Marble floors are always hard to remove, but depending on the age of the floor and the installation method, they can be just moderately difficult or they can be brutally hard.
Two Installation Methods
Newer marble flooring, like newer ceramic tile floors, may have been laid with thin-set mortar adhesive over a plywood or cement board underlayment. These floors often consist of stone tiles rather than larger slabs, and removal of these floors, while physically hard, is not complicated and requires mostly patience and some elbow grease.
It becomes considerably more difficult and complicated with older marble floors, which often were installed using a thick mortar-bed method, in which the marble tiles or slabs were embedded in a thick layer of cement mortar, often reinforced with wire mesh. Removing such a floor is one of the most demanding jobs there is, and for a floor of any size, you should plan on a week or so of hard labor to remove it. Marble is heavy and strong, and breaking it into pieces is difficult under the best circumstances. When the stone is embedded in mesh-reinforced concrete mortar, the project can epic.
The only way to know what kind of floor you have is to break out an area of the marble to see what the underlying structure is. Thin-set applications will break free of the subfloor fairly easily, while thick mortar bed installations will be a major chore just to get a single area removed.
Be aware that if you begin breaking up a marble floor, you are in it for the long run and there is no turning back. Before beginning, think carefully about laying the new floor over the existing marble instead.
Breaking the Marble
If the only option is to remove the floor, then the project begins with a crash—by smashing some things.
Preparation
Make sure to wear long sleeves and trousers with heavy fabric, as well as hearing protectors and eye protection. Shards of marble will likely be flying during this process, and you need to take every precaution against being cut or otherwise injured. Bashing marble with a sledgehammer can be deafening, so make sure to wear hearing protectors. If the area is not well ventilated, you may also need a breathing mask due to dust particles filling the air.
Beginning the Work
Beginning in the center of the room, use a sledgehammer to crack several tiles. Aim for grout lines as these will be the weakest points. As you work with the sledgehammer, be careful not to get carried away. You want to crack the material so that it can be removed, but at the same time avoid damaging the subfloor in the process.
Begin Removing Large Pieces
Once you have the marble cracked and shattered in several places you can start to remove large pieces from the floor. You can either use a floor scraper from a standing position to pry up large sections of tile, or use the flat edge of a masonry chisel to slide up under the side of individual tiles to lift them away. You may need to jab at the mortar underneath to crack its hold.
Mortar Bed Installations
This is the point where you will recognize if your marble was installed in a thick mortar bed reinforced with wire mesh. If so, you may now need to begin cutting the mesh apart with aviation shears to free it from the floor. This is hard work, but it has the advantage of allowing larger sections of marble to be pulled up intact. Make sure to wear heavy leather gloves during this work, as the wire mesh can be sharp when you cut it apart.
Chisel Up Smaller Remnants
The sledgehammer is only for breaking up the tile, not for removing everything. For smaller pieces of stubborn stuck-on debris, place the cutting edge of the masonry chisel against the bottom side of the tile, then tap the handle of the tool with a hammer. This will force the sharp edge of the chisel under the mortar and free the shard.
Smoothing the Subfloor
Use a flat-bladed paint scraper to pry up the last of the thin-set mortar that remains dried to the subfloor. In some cases, you may need to use medium or coarse sandpaper to smooth out the surface. Floor-leveling compound can also be used to repair any damages that occurred during the removal process.
Make sure that the subfloor is completely flat, even, and free of defects before you move on to installing new surface flooring over it. In some cases, the best strategy will be to install a new layer of thin underlayment over the subfloor to make it suitable for new flooring.

- News Reviews
- Popular Products
-
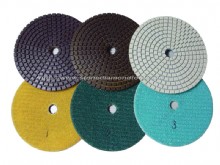
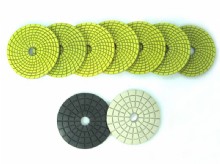
- 3 Step Polishing Pad (3SP_01)Clicks:64749
- CUTTING &GRINDING WHEELS (HN1Clicks:61939

- RCB resin copper bond polishinClicks:58243
- 3'' Metal Resin Transitional PClicks:34460
- Fickert Diamond Brush AB05DClicks:22110
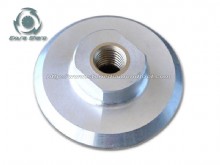
- Aluminium Backer Pad BP01Clicks:19950
- Spiral yellow and green Wet PaClicks:19722
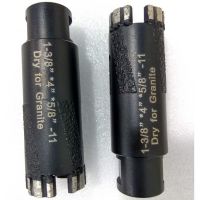
- Diamond wet dry core drill bitClicks:18904
- Products Categories
- Brazed Drill Bit Diamond Cutting Tools Diamond Saw Blade Diamond Small Blade Diamond Segment Diamond Wire Saw Electroplated Blade Multi Blades and Single Saws Diamond Polishing Tools Wet Polishing Pads Dry Polishing Pads Concrete Tooling Diamond Profile Wheel Polishing Drum wheel Abrasive Stone For Granite Abrasive Stone For Marble Backer Pads Grinding Discs Diamond Grinding Tools Sintered Cup Wheels Brazed cup wheels Profiling Router Bit Router Bits CNC Profile Wheels CNC Finger Bits Brazed Router Bits Diamond Core Drill Bit Diamond Core Drill Bit Vacuum Brazed Drill Bits Electroplated core bits Construction Core Drill Bit English drill and construstion Drill Dry Diamond Core Drill Bit Diamond Carving Tools Common Carving Tools High-speed Carving Tools Stone Profiler Machines Air Grinder Wet Grinder Angle Grinder Multi Function Wet Grinder Stone Router Machines Abrasive Brush Other Accessories Brush For Floor Series Diamond Brush Series Brush For Steel Wire Series Brush For Rutine Series Bush Hammer Plates Diamond Rollers The thick round Epoxy Floor Tools Microcement Tools STONE Product
- www.sssto.com | www.chinastonesuppliers.com | www.chinadiamondtool.com | www.chinatoolstore.com | diamond tools supply
- javascript:;
-
-
© 2009-2012 All rights reserved Support:www.zawl.cn
-