


- Focus News
-
3 Making Modes of Metal-Bonded Diamond Grinding Wheels
How do I polish a granite edge
- Contact Us
-
Tel:0592-5099391
Fax:0592-5099319
ADD:Unit 2A, Lianchang Building, NO.6-8 Huli Avenue, Huli District,Xiamen,China.
www.stonediamondtool.com

- Details
-
HOW TO REMOVE MARBLE FLOORING
Source:www.stonediamondtool.com Date:2019/10/29 Read:567
By Laurie Brenner
While marble flooring certainly adds beauty to the home, it is also a slipping hazard when it gets wet. Because of its porosity, it is also easy to stain when it is on the floor. Marble flooring installs in tiles, typically 12 square inches or bigger fitted tightly together and sealed between tiles by grout. To replace the flooring in a room that has marble, you will need to remove the tiles to get at and clean the underlayment for the next flooring material. This is easily accomplished with tools you'll find in your home's tool chest.
1. Take off the baseboards in the room that has the marble flooring. Write a number on the wall and the same number on the back of the baseboard with the felt-tip pen. This makes it easy to identify where the baseboards go on reinstallation. Insert a screwdriver, pry bar or putty knife in the space between the baseboard and the wall. Pull the tool toward you to pull the nails and the baseboard from the wall. Work close to the nail location to reduce the chance of breaking the baseboard during removal. Remove the nails and set the baseboards aside.
2. Cover and protect any items in the room that could be damaged by flying tile shards. Use old blankets or dropcloths as protective coverings.
3. Put on gloves and eye protection. Score the grout lines between the marble tiles using a grout-scoring tool or chisel. If using a chisel, place the chisel at a slight angle atop the grout and use the hammer to tap on the chisel as it gouges and removes the grout.
4. Vacuum the grout debris and dust up from the marble tiles with the wet-dry vacuum.
5. Insert a pry bar between two marble tiles and catch its lip underneath the tile. Push down on the pry bar until it lifts the tile. It may take several attempts to get the lip of the pry bar underneath the tile. To save the tile for use elsewhere if it is not cut or broken, scrape off the thinset by using the putty knife across the back of the tile. Set the tile aside.
6. Repeat Step 4 until all marble tiles are removed.
7. Remove the thinset from the underlayment by scraping it with a putty knife and vacuuming the debris.
Things You Will Need
§ Pry bar
§ Felt-tip pen
§ Old blankets or dropcloths
§ Gloves
§ Safety goggles
§ Claw hammer
§ Chisel
§ Grout-removing tool
§ Wet-dry vacuum
§ Putty knife
Tip
§ Once you remove the tiles from the floor and clean the underlayment, you might need to resurface or replace the underlayment if you plan on laying a new tile floor. For tiles that do not want to come up, wear gloves and safety goggles and hammer the tile into pieces to break the hold the thinset has on the tile. Discard broken shards safely. Don't use a regular vacuum to clean up debris, as tile shards can be hazardous to such equipment. A shop wet-dry vacuum has a large hose and is made for such purposes.
Warning
§ Wear safety goggles and gloves when working with the tile. If the marble tile breaks, the pieces are sharp and can cut fingers or hands. Goggles protect your eyes from flying pieces.

- News Reviews
- Popular Products
-
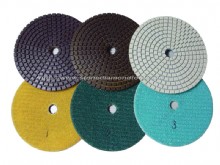
- 3 Step Polishing Pad (3SP_01)Clicks:64749
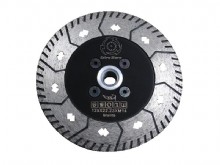
- CUTTING &GRINDING WHEELS (HN1Clicks:61939

- RCB resin copper bond polishinClicks:58243
- 3'' Metal Resin Transitional PClicks:34460
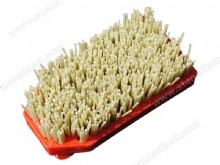
- Fickert Diamond Brush AB05DClicks:22110
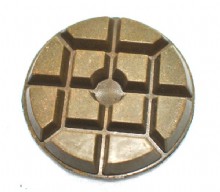
- Aluminium Backer Pad BP01Clicks:19950
- Spiral yellow and green Wet PaClicks:19722
- Diamond wet dry core drill bitClicks:18904
- Products Categories
- Brazed Drill Bit Diamond Cutting Tools Diamond Saw Blade Diamond Small Blade Diamond Segment Diamond Wire Saw Electroplated Blade Multi Blades and Single Saws Diamond Polishing Tools Wet Polishing Pads Dry Polishing Pads Concrete Tooling Diamond Profile Wheel Polishing Drum wheel Abrasive Stone For Granite Abrasive Stone For Marble Backer Pads Grinding Discs Diamond Grinding Tools Sintered Cup Wheels Brazed cup wheels Profiling Router Bit Router Bits CNC Profile Wheels CNC Finger Bits Brazed Router Bits Diamond Core Drill Bit Diamond Core Drill Bit Vacuum Brazed Drill Bits Electroplated core bits Construction Core Drill Bit English drill and construstion Drill Dry Diamond Core Drill Bit Diamond Carving Tools Common Carving Tools High-speed Carving Tools Stone Profiler Machines Air Grinder Wet Grinder Angle Grinder Multi Function Wet Grinder Stone Router Machines Abrasive Brush Other Accessories Brush For Floor Series Diamond Brush Series Brush For Steel Wire Series Brush For Rutine Series Bush Hammer Plates Diamond Rollers The thick round Epoxy Floor Tools Microcement Tools STONE Product
- www.sssto.com | www.chinastonesuppliers.com | www.chinadiamondtool.com | www.chinatoolstore.com | diamond tools supply
- javascript:;
-
-
© 2009-2012 All rights reserved Support:www.zawl.cn
-