


- Focus News
-
3 Making Modes of Metal-Bonded Diamond Grinding Wheels
How do I polish a granite edge
- Contact Us
-
Tel:0592-5099391
Fax:0592-5099319
ADD:Unit 2A, Lianchang Building, NO.6-8 Huli Avenue, Huli District,Xiamen,China.
www.stonediamondtool.com

- Details
-
HOW TO RESTORE A MARBLE FLOOR
Source:www.stonediamondtool.com Date:2019/12/4 Read:604
Marble floors, when newly installed, have a glossy, reflective finish that shifts with changes in light to provide a look of elegance to a room. With use however, this finish tends to dim, losing its luster as the tiles become dulled and scratched. This can be a problem especially if you are getting the house ready to sell. Cleaning your marble floor at this point makes little difference; scratched or broken tiles always appear somewhat dirty. There is hope for a damaged marble floor, though. You can restore the floor to its original glory. With a bit of manual labor you can restore your floor’s finish, repairing the surface and buffing a shine into it that makes the marble look as good as it did on the day it was installed.
1. Search the floor surface for loose or broken tiles, and then remove them for replacement. Strip the grout surrounding the tiles that you’re removing by using a utility knife to cut the grout out of the joints. Place the end of a prybar beneath the loose or damaged tiles and apply pressure to the bar to pull the tiles away from the floor. Set the tiles aside.
2. Clear the subfloor beneath the removed tiles of the mortar that held the tiles in place. Scrape the mortar away using a rotary tool with a carbide blade. Hold the tool against the mortar at a 45-degree angle and turn on the blade. Move the blade against the mortar, cutting through to the subfloor beneath, and then move the blade along the subfloor to remove the mortar. Turn off the tool and sweep up the mortar from the subfloor’s surface.
3. Replace the loosened tiles back onto the floor using thinset mortar. Spread the mortar along the rear of the tiles using a notched steel trowel and then use the notches in the trowel to raise the mortar into a series of ridges for better gripping. Press the tile to the floor, aligned with the surrounding tiles and maintaining the same spacing. Make certain that the tile is level with the surrounding tiles using a carpenter’s level, adjusting the tiles as needed. Replace the broken tiles with whole tiles purchased to match the tiles in the room. Remove any excess mortar from the surface of the tile immediately and allow the mortar to set for two hours.
4. Regrout the joints surrounding the tiles by spreading the grout across the tile surface with a grouting float to fill the joints completely. Remove any excess grout from the surface of the tiles using a damp sponge within 15 minutes of grout placement. Wait two hours and then wipe the surface of the tiles with a lint-free cloth to remove any grout residue before it hardens in place. Wait 24 hours before continuing with the floor restoration to allow the mortar and grout to begin to set.
5. Remove any scratches from the marble floor tiles by honing the surface. Attach 100-grit sandpaper to an orbital sander and run the sander over the scratches, using small circles to grind the edges of the scratches down to the tile surface, leaving light lines in the tile. Change the sandpaper to 150-grit and apply the sander to the light lines, grinding at the marble until you can no longer see the lines. Change the sandpaper a final time to 220-grit and sand the surface of the tiles again, smoothing the tiles to the touch.
6. Use a 4-inch angle grinder with a polishing pad to polish the floor tiles. Pour a quarter-sized circle of polish onto the pad and then place the pad onto the tile. Turn on the grinder and polish the surface of the tile with the pad, spreading the polish onto the tiles. Allow the polish to dry until it turns grey.
7. Place the pad back onto the tile and turn it on again. Go over the grey polish, buffing the dried polish to a gloss. More than a single application may be required to sufficiently polish the tile.
8. Brush a light layer of stone sealant over the marble to prevent staining. Allow the sealant to dry for 48 hours before using the marble floor.
Tip
§ For larger floors, replace the orbital sander and angle grinder with a floor sander equipped with sanding and buffing pads.
Warning
§ Wear work gloves and safety goggles when working with the marble to prevent injury to hands and eyes. Don a dust mask to prevent breathing in particles during the honing process.

- News Reviews
- Popular Products
-
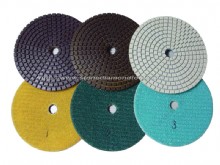
- 3 Step Polishing Pad (3SP_01)Clicks:64749
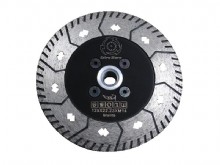
- CUTTING &GRINDING WHEELS (HN1Clicks:61939

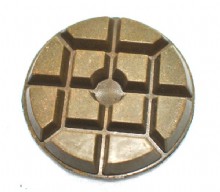
- RCB resin copper bond polishinClicks:58243
- 3'' Metal Resin Transitional PClicks:34460
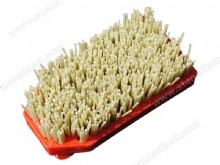
- Fickert Diamond Brush AB05DClicks:22110
- Aluminium Backer Pad BP01Clicks:19950
- Spiral yellow and green Wet PaClicks:19722

- Diamond wet dry core drill bitClicks:18904
- Products Categories
- Brazed Drill Bit Diamond Cutting Tools Diamond Saw Blade Diamond Small Blade Diamond Segment Diamond Wire Saw Electroplated Blade Multi Blades and Single Saws Diamond Polishing Tools Wet Polishing Pads Dry Polishing Pads Concrete Tooling Diamond Profile Wheel Polishing Drum wheel Abrasive Stone For Granite Abrasive Stone For Marble Backer Pads Grinding Discs Diamond Grinding Tools Sintered Cup Wheels Brazed cup wheels Profiling Router Bit Router Bits CNC Profile Wheels CNC Finger Bits Brazed Router Bits Diamond Core Drill Bit Diamond Core Drill Bit Vacuum Brazed Drill Bits Electroplated core bits Construction Core Drill Bit English drill and construstion Drill Dry Diamond Core Drill Bit Diamond Carving Tools Common Carving Tools High-speed Carving Tools Stone Profiler Machines Air Grinder Wet Grinder Angle Grinder Multi Function Wet Grinder Stone Router Machines Abrasive Brush Other Accessories Brush For Floor Series Diamond Brush Series Brush For Steel Wire Series Brush For Rutine Series Bush Hammer Plates Diamond Rollers The thick round Epoxy Floor Tools Microcement Tools STONE Product
- www.sssto.com | www.chinastonesuppliers.com | www.chinadiamondtool.com | www.chinatoolstore.com | diamond tools supply
- javascript:;
-
-
© 2009-2012 All rights reserved Support:www.zawl.cn
-