


- Focus News
-
3 Making Modes of Metal-Bonded Diamond Grinding Wheels
How do I polish a granite edge
- Contact Us
-
Tel:0592-5099391
Fax:0592-5099319
ADD:Unit 2A, Lianchang Building, NO.6-8 Huli Avenue, Huli District,Xiamen,China.
www.stonediamondtool.com

- Details
-
HOW TO APPLY CONCRETE SEALER
Source:www.stonediamondtool.com Date:2020/1/6 Read:583
Concrete sealers will make your concrete more resistant to weather exposure, water, grease and oil stains, abrasion and deicing salts. What's more, they will help to bring out the natural beauty of your concrete and make it easier to clean. But in order for a sealer to work its magic, it must be applied properly. Each step, from surface preparation to choosing the right application tool, will have a big impact on the final outcome.
Following are some tips for applying concrete sealer properly. Whichever brand of sealer you use, be sure to follow the specific instructions recommended by the product manufacturer, since they may differ from the general guidelines given here.
Here’s a step-by-step summary of how to seal concrete:
Remove all oil, grease, stains, dirt, and dust from the concrete
Strip any existing sealer from the surface
Open up the concrete with an etching solution
Apply a thin coat of sealer using a roller or sprayer
Wait for the first layer of sealer to dry
Apply a second coat in the opposite direction
Allow the sealer to fully dry before walking or driving on your concrete
Read on for more details about sealing concrete and the steps involved.
When to seal concrete
When you apply sealer can be important as well. Allow new concrete to cure completely (at least 28 days or as recommended). Most sealers must be applied under dry conditions, since applying sealer to damp concrete could cause haziness or loss of adhesion. Air temperatures are also important and should typically be above 50°F during and for at least 24 hours after sealer application. Always allow the sealer to dry completely before exposing it to foot or vehicle traffic. Drying times before exposure to heavy traffic can be as long as three days.
Preparing concrete for sealing
Surface preparation before applying a sealer to existing concrete is extremely important. All oil, grease, stains, dirt, and dust must be removed or they may prevent the sealer from adhering properly. Also, if a sealer is being applied over a different brand of sealer, most manufacturers advise removing all traces of previously used sealers, since the products may not be compatible. Some manufacturers recommend etching the surface first with an etching solution to ensure the best adhesion.
How to apply concrete sealer
Using the right tools is critical to achieving the best coverage rate and sealer thickness for optimal performance. The two most common methods of applying sealers to concrete surfaces are by roller or sprayer, often depending on whether the sealer is solvent- or water-based. Always refer to the manufacturer's specific application guidelines.
Whether you are rolling or spray applying a sealer, always strive for maximum coverage. The typical coverage rate is 250 to 300 square feet per gallon, depending on the porosity of the concrete. The most important rule to remember is that less is more. It's best to apply two thin coats, making sure the sealer doesn't puddle or form uneven, thick areas. When applying a second coat of sealer, apply it in the opposite direction (or perpendicular) to the first coat to ensure even coverage. Wait to apply the second coat of sealer for the time recommended by the manufacturer (typically two to four hours).

- News Reviews
- Popular Products
-
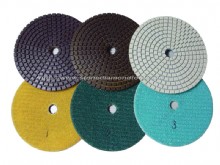
- 3 Step Polishing Pad (3SP_01)Clicks:64721
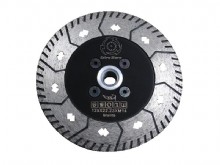
- CUTTING &GRINDING WHEELS (HN1Clicks:61912

- RCB resin copper bond polishinClicks:58214
- 3'' Metal Resin Transitional PClicks:34431
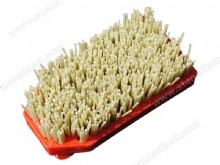
- Fickert Diamond Brush AB05DClicks:22080
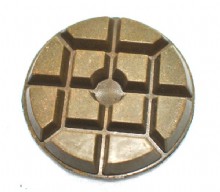
- Aluminium Backer Pad BP01Clicks:19921
- Spiral yellow and green Wet PaClicks:19696
- Diamond wet dry core drill bitClicks:18878
- Products Categories
- Brazed Drill Bit Diamond Cutting Tools Diamond Saw Blade Diamond Small Blade Diamond Segment Diamond Wire Saw Electroplated Blade Multi Blades and Single Saws Diamond Polishing Tools Wet Polishing Pads Dry Polishing Pads Concrete Tooling Diamond Profile Wheel Polishing Drum wheel Abrasive Stone For Granite Abrasive Stone For Marble Backer Pads Grinding Discs Diamond Grinding Tools Sintered Cup Wheels Brazed cup wheels Profiling Router Bit Router Bits CNC Profile Wheels CNC Finger Bits Brazed Router Bits Diamond Core Drill Bit Diamond Core Drill Bit Vacuum Brazed Drill Bits Electroplated core bits Construction Core Drill Bit English drill and construstion Drill Dry Diamond Core Drill Bit Diamond Carving Tools Common Carving Tools High-speed Carving Tools Stone Profiler Machines Air Grinder Wet Grinder Angle Grinder Multi Function Wet Grinder Stone Router Machines Abrasive Brush Other Accessories Brush For Floor Series Diamond Brush Series Brush For Steel Wire Series Brush For Rutine Series Bush Hammer Plates Diamond Rollers The thick round Epoxy Floor Tools Microcement Tools STONE Product
- www.sssto.com | www.chinastonesuppliers.com | www.chinadiamondtool.com | www.chinatoolstore.com | diamond tools supply
- javascript:;
-
-
© 2009-2012 All rights reserved Support:www.zawl.cn
-