


- Focus News
-
3 Making Modes of Metal-Bonded Diamond Grinding Wheels
How do I polish a granite edge
- Contact Us
-
Tel:0592-5099391
Fax:0592-5099319
ADD:Unit 2A, Lianchang Building, NO.6-8 Huli Avenue, Huli District,Xiamen,China.
www.stonediamondtool.com

- Details
-
HOW TO HAND FINISH A CONCRETE COUNTERTOP
Source:www.stonediamondtool.com Date:2020/1/10 Read:593
When you take the time to create a concrete countertop, you don’t want to skimp on the time necessary to create a smooth finish. As you finish working the concrete in its form, you want to hand trowel the surface as smooth as possible to minimize any rough surfaces on the countertop. Allow the concrete countertop to cure completely before you remove the forms and set the countertop in place. Once the countertop is set on the base cabinets, finish it with a hand polisher to give it a smooth-as-glass appearance.
1. Fasten a hook-and-loop 50-grit polishing pad to a variable speed hand polisher. Dampen the concrete surface. Some hand polishers attach to a garden hose to provide a small, steady stream of water to cool the polishing head. Go over the entire surface of the concrete, including the edges, with the hand polisher. Keep the polisher level as you go to keep the surface even. Wipe off any grit that remains.
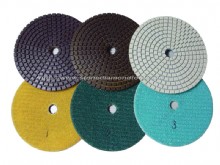
2. Switch to a 100-grit pad on the polisher. Go over the surface again. Wipe off the surface. Repeat this step by changing to successively finer grit polishing pads. Use a 200-grit, 400-grit, 800-grit and 1500-grit polishing pad in that order. If you wish, finish with a 1600-grit pad.
3. Clean the countertop surface with a mixture of 1/4 to 1/2 cup vinegar mixed in a gallon of water. This slightly acidic mixture helps neutralize the alkalinity of the concrete. Follow the vinegar mixture with a mixture of 1 cup of household ammonia mixed into a gallon of water to counteract the effects of the vinegar mixture. Rinse the ammonia mixture from the countertop with clear water and wipe the countertop dry with a clean cloth. The countertop should not be a neutral pH.
4. Apply a concrete sealer to the countertop. Select one that is food safe and creates non-permeable protection for the countertop to prevent staining. Follow manufacturer’s directions as you apply the sealer with a paintbrush or roller. Allow the sealer time to dry following manufacturer’s recommendations. The length of drying time depends on temperature and humidity.
Tips
§ Look for a hand polisher that has an “On” button that you can lock on. It creates less wear on your hands.
§ The appearance of the final finish of the sealer is a matter of personal preference. You can select finishes that range from flat to high gloss.
Warning
§ Plug the polisher into a ground-fault circuit interrupter outlet. If the wiring from the polisher is exposed to water in an unsafe manner, the outlet automatically shuts off the electrical power to the polisher.

- News Reviews
- Popular Products
-
- 3 Step Polishing Pad (3SP_01)Clicks:64749
- CUTTING &GRINDING WHEELS (HN1Clicks:61939

- RCB resin copper bond polishinClicks:58243
- 3'' Metal Resin Transitional PClicks:34460
- Fickert Diamond Brush AB05DClicks:22110
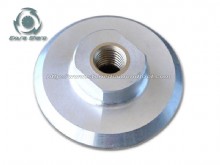
- Aluminium Backer Pad BP01Clicks:19950
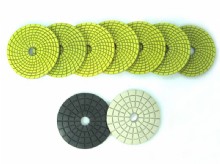
- Spiral yellow and green Wet PaClicks:19722
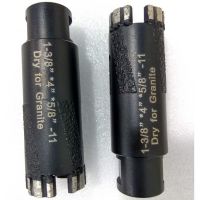
- Diamond wet dry core drill bitClicks:18904
- Products Categories
- Brazed Drill Bit Diamond Cutting Tools Diamond Saw Blade Diamond Small Blade Diamond Segment Diamond Wire Saw Electroplated Blade Multi Blades and Single Saws Diamond Polishing Tools Wet Polishing Pads Dry Polishing Pads Concrete Tooling Diamond Profile Wheel Polishing Drum wheel Abrasive Stone For Granite Abrasive Stone For Marble Backer Pads Grinding Discs Diamond Grinding Tools Sintered Cup Wheels Brazed cup wheels Profiling Router Bit Router Bits CNC Profile Wheels CNC Finger Bits Brazed Router Bits Diamond Core Drill Bit Diamond Core Drill Bit Vacuum Brazed Drill Bits Electroplated core bits Construction Core Drill Bit English drill and construstion Drill Dry Diamond Core Drill Bit Diamond Carving Tools Common Carving Tools High-speed Carving Tools Stone Profiler Machines Air Grinder Wet Grinder Angle Grinder Multi Function Wet Grinder Stone Router Machines Abrasive Brush Other Accessories Brush For Floor Series Diamond Brush Series Brush For Steel Wire Series Brush For Rutine Series Bush Hammer Plates Diamond Rollers The thick round Epoxy Floor Tools Microcement Tools STONE Product
- www.sssto.com | www.chinastonesuppliers.com | www.chinadiamondtool.com | www.chinatoolstore.com | diamond tools supply
- javascript:;
-
-
© 2009-2012 All rights reserved Support:www.zawl.cn
-