


- Focus News
-
3 Making Modes of Metal-Bonded Diamond Grinding Wheels
How do I polish a granite edge
- Contact Us
-
Tel:0592-5099391
Fax:0592-5099319
ADD:Unit 2A, Lianchang Building, NO.6-8 Huli Avenue, Huli District,Xiamen,China.
www.stonediamondtool.com

- Details
-
Glass Polishing by Machine - Defect Correction
Source:www.stonediamondtool.com Date:2020/5/26 Read:528
Search the forums and you will find thousands of threads about the correction of defects from paint - hard paint, soft paint, white paint, black paint, pink paint etc... But you'll also notice a complete dearth of threads about removing defects from glass! In this thread I am going to introduce a technique and polishes I have been using on glass in testing in recent months, with further threads to come with more detailed results as well.
First things first - glass is tough! Very tough! Think the hardest paint type, and multiple by "A Large Number" and you're getting there! Many glasses you can clean with steel wool and not scratch them! So, as you can probably imagine, the use of traditional paint polishes and abrasives is rather out of the question. But how then, can we deal with marks like this on glass?
These marks are wiper sweep marks, typical on a lot of glass. In particular, Porsche owners complain of their windscreens being afflicted by this wiper sweep marking which can be very distracting on a sunny day!
Removal of such marks requires specialist abrasives designed for task - cerium oxide is one such abrasive type, and is found in a few glass correction products. The one used for these tests is Liquid Glass, produced by Rapid Autocare. It is supplied in a kit designed for use with a drill - comes with the polish (very watery) and a couple of rayon pads. A a sponge which I am sure has a use, but not sure what it is yet - was useful for blowing my nose though.
Now, one major concern here is heat. The correction of glass requires a lot of effort owing to its hardness and this can lead to large heat built up. It is important to monitor this very carefully, as high heat can disform the glass, distorting vision and making a replacement necessary. Always be aware of this when glass polishing! Using a drill, if you stay in the same place too long, you will distort the glass - trust me
The techniques that we have been working on for glass involve the use of a rotary polisher, a 2" backing plate (Ben at Carnaubawax Shop has them ), and 2" Rayon pads (again, Ben has these, or use the ones in the kit). The pad is primed with the watery polish, and a region of about 6" square at a time is polished as follows:
· Spread at 600rpm
· Begin to work at 1200rpm, light pressure and maintain this speed until polish well spread to avoid splatter later
· Work at 2000rpm, light to medium pressure, slow machine movements for a minute or so
· Work at 2500rpm, medium to heavy rotary pressure*, slow machine movements monitoring the heat very carefully until polish starts to dry a little
· Finish at 1200 - 1500rpm, light pressure and faster machine movements
* Be very careful not to bow, or break glass with too heavy pressure and at all times monitor the heat. It should never get too hot to tap by hand, perhaps a little too hot to hold for a while.
Essentially a high-speed Zenith Point technique, with a typical set lasting three or four minutes. Care was taken throughout to monitor the heat of the glass (did I mention heat again? It's important· The results, here on Vauxhall Astra glass, are as follows:
A definite difference, and a definite improvement! These results have been replicated during details too thus far, most notably on a Porsche 911 which Gordon detailed recently
Further testing is still required for dealing with deeper glass scratches, and further writeups will follow based on this and alterations of the above technique. Hopefully this will give a flavour for what is possible on glass though with a rotary polisher and the right products

- News Reviews
- Popular Products
-
- 3 Step Polishing Pad (3SP_01)Clicks:64749
- CUTTING &GRINDING WHEELS (HN1Clicks:61939

- RCB resin copper bond polishinClicks:58243
- 3'' Metal Resin Transitional PClicks:34460
- Fickert Diamond Brush AB05DClicks:22110
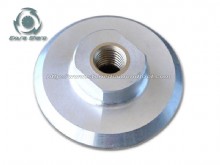
- Aluminium Backer Pad BP01Clicks:19950
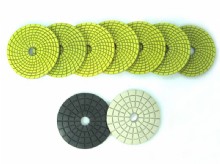
- Spiral yellow and green Wet PaClicks:19722
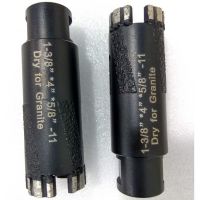
- Diamond wet dry core drill bitClicks:18904
- Products Categories
- Brazed Drill Bit Diamond Cutting Tools Diamond Saw Blade Diamond Small Blade Diamond Segment Diamond Wire Saw Electroplated Blade Multi Blades and Single Saws Diamond Polishing Tools Wet Polishing Pads Dry Polishing Pads Concrete Tooling Diamond Profile Wheel Polishing Drum wheel Abrasive Stone For Granite Abrasive Stone For Marble Backer Pads Grinding Discs Diamond Grinding Tools Sintered Cup Wheels Brazed cup wheels Profiling Router Bit Router Bits CNC Profile Wheels CNC Finger Bits Brazed Router Bits Diamond Core Drill Bit Diamond Core Drill Bit Vacuum Brazed Drill Bits Electroplated core bits Construction Core Drill Bit English drill and construstion Drill Dry Diamond Core Drill Bit Diamond Carving Tools Common Carving Tools High-speed Carving Tools Stone Profiler Machines Air Grinder Wet Grinder Angle Grinder Multi Function Wet Grinder Stone Router Machines Abrasive Brush Other Accessories Brush For Floor Series Diamond Brush Series Brush For Steel Wire Series Brush For Rutine Series Bush Hammer Plates Diamond Rollers The thick round Epoxy Floor Tools Microcement Tools STONE Product
- www.sssto.com | www.chinastonesuppliers.com | www.chinadiamondtool.com | www.chinatoolstore.com | diamond tools supply
- javascript:;
-
-
© 2009-2012 All rights reserved Support:www.zawl.cn
-