


- Focus News
-
3 Making Modes of Metal-Bonded Diamond Grinding Wheels
How do I polish a granite edge
- Contact Us
-
Tel:0592-5099391
Fax:0592-5099319
ADD:Unit 2A, Lianchang Building, NO.6-8 Huli Avenue, Huli District,Xiamen,China.
www.stonediamondtool.com

- Details
-
HOW TO EMBED GLASS IN CONCRETE COUNTERTOPS
Source:www.stonediamondtool.com Date:2020/5/28 Read:611
By Scott Cohen, The Green Scene
The popularity of cast concrete outdoor kitchen counters continues to grow at a rapid rate. The ease of maintenance, ability to withstand the elements and versatility are certainly contributing factors, but I believe it is the beautiful rich look that has given concrete counters the lift to fame.
While concrete is not the only option for outdoor kitchen countertops, it is my favorite for a variety of reasons.
One way that outdoor counters are being enhanced is with glass embeds. Variations in the use of glass chips in decorative concrete are limited only by your imagination. How the glass is applied, the quantities of glass used, chip size and the mixes of colors chosen can provide a unique signature product for those up to the challenge.
Glass can be added to concrete counters by either (1) seeding the surface or (2) mixing the glass chips integrally. "Seeding" glass means sprinkling, or spreading the glass onto the surface of the concrete after the concrete has been placed into the counter mold. The advantages of seeding glass is that you use a lot less glass compared to mixing integrally and you have more control over placement of different colors and mixes. The disadvantage to hand seeding is that it is tricky to uniformly spread the glass and it requires a more experienced masonry finisher to produce a quality piece. I prefer hand seeding because of the versatility it gives me with color blending.
Seven steps to cast in place concrete countertops with glass embeds
Step 1: Make the mold
Prepare your countertop mold and apply release agent to the forms. If you want glass presence in the edge details, toss glass chips up against your edge forms before placing concrete.
Step 2: Pour and Vibrate
Place your concrete mixture into molds and lightly vibrate the forms and concrete to consolidate the concrete. Consolidated concrete is denser and less porous resulting in less shrinkage cracks and improved stain resistance. On most projects I use an integral colored concrete mixture (Davis brand Sandstone and Adobe are the most popular).
Tip: Add an acrylic fortifier to your mix. Use of an acrylic fortifier to the concrete mix helps glass chips adhere to the concrete. Acrylic fortifiers also improve resistance to water penetration.
Step 3: Rough Finish
Bull float the concrete to smooth out the surface, but don't rough trowel or finish trowel just yet.
Step 4: Seed the glass
Spread the glass out evenly on your concrete surface using whatever quantity, colors, and mixes that you desire.
If you are using varying size glass chips, apply the larger sizes first, then medium chips and finish off with the smaller chips.
Here's a fun one: They now have glow in the dark glass! Try some in your counter mix as an inexpensive conversation stimulator.
Step 5: Tamp and Trowel
Carefully tamp the glass down into the top surface of the concrete mixture with a wood float. Lightly trowel the glass into the concrete gently pushing the glass into the still wet mixture until all glass is covered with the cementitious cream. Take care not to push the glass too deep into the mixture or you will have an uneven glass presence and the grind, hone, and polishing process can take much longer.
Step 6: Cure the concrete
Allow the concrete to cure for approximately 7-14 days depending on atmospheric conditions. Attempting to finish the surface too early will damage the surface and send glass chips flying. Finishing the surface too late will take much longer and will put undue wear on your finishing tools. Any cure time between 7-28 days is acceptable.
Step 7: Grind, Hone and Polish
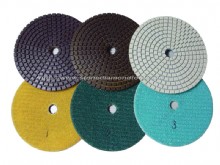
Heavy-duty polishing tools are equipped with progressively finer grits of diamond-impregnated pieces or disks (similar to sandpaper) to gradually grind down the surface until the desired amount of glass and stone is revealed. I prefer to use a multi-head polisher rather than a single head polisher for a swirl free finish on the top surface. "Wet" grinding, sanding, and polishing reduces the amount of dust you will be exposed too compared with a dry grinding process. Take time with each progressive level of sanding using finer and finer grits until the sheen you desire is accomplished.
Tip: Be patient with each level of polishing grits. If you rush to the next finer grit too soon you'll burn through those expensive diamond-tipped polishing pads too quickly.
Step 8: Seal the Surface
After allowing the counter to cure at least 28 days and dry completely from the polishing process, apply the sealer, or combination of sealers that best suit your needs
Tip: If you seal before the counter is completely dried out a milky cloudiness can appear below the sealer and taint the appearance of your finished piece.
If you are using varying size glass chips, apply the larger sizes first, then medium chips and finish off with the smaller chips.
Here's a fun one: They now have glow in the dark glass! Try some in your counter mix as an inexpensive conversation stimulator.
Heavy-duty polishing tools are equipped with progressively finer grits of diamond-impregnated pieces or disks (similar to sandpaper) to gradually grind down the surface until the desired amount of glass and stone is revealed. I prefer to use a multi-head polisher rather than a single head polisher for a swirl free finish on the top surface. "Wet" grinding, sanding, and polishing reduces the amount of dust you will be exposed too compared with a dry grinding process. Take time with each progressive level of sanding using finer and finer grits until the sheen you desire is accomplished.
Tip: Be patient with each level of polishing grits. If you rush to the next finer grit too soon you'll burn through those expensive diamond-tipped polishing pads too quickly.

- News Reviews
- Popular Products
-
- 3 Step Polishing Pad (3SP_01)Clicks:64749
- CUTTING &GRINDING WHEELS (HN1Clicks:61939

- RCB resin copper bond polishinClicks:58243
- 3'' Metal Resin Transitional PClicks:34460
- Fickert Diamond Brush AB05DClicks:22110
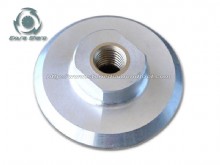
- Aluminium Backer Pad BP01Clicks:19950
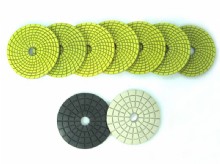
- Spiral yellow and green Wet PaClicks:19722

- Diamond wet dry core drill bitClicks:18904
- Products Categories
- Brazed Drill Bit Diamond Cutting Tools Diamond Saw Blade Diamond Small Blade Diamond Segment Diamond Wire Saw Electroplated Blade Multi Blades and Single Saws Diamond Polishing Tools Wet Polishing Pads Dry Polishing Pads Concrete Tooling Diamond Profile Wheel Polishing Drum wheel Abrasive Stone For Granite Abrasive Stone For Marble Backer Pads Grinding Discs Diamond Grinding Tools Sintered Cup Wheels Brazed cup wheels Profiling Router Bit Router Bits CNC Profile Wheels CNC Finger Bits Brazed Router Bits Diamond Core Drill Bit Diamond Core Drill Bit Vacuum Brazed Drill Bits Electroplated core bits Construction Core Drill Bit English drill and construstion Drill Dry Diamond Core Drill Bit Diamond Carving Tools Common Carving Tools High-speed Carving Tools Stone Profiler Machines Air Grinder Wet Grinder Angle Grinder Multi Function Wet Grinder Stone Router Machines Abrasive Brush Other Accessories Brush For Floor Series Diamond Brush Series Brush For Steel Wire Series Brush For Rutine Series Bush Hammer Plates Diamond Rollers The thick round Epoxy Floor Tools Microcement Tools STONE Product
- www.sssto.com | www.chinastonesuppliers.com | www.chinadiamondtool.com | www.chinatoolstore.com | diamond tools supply
- javascript:;
-
-
© 2009-2012 All rights reserved Support:www.zawl.cn
-