


- Focus News
-
3 Making Modes of Metal-Bonded Diamond Grinding Wheels
How do I polish a granite edge
- Contact Us
-
Tel:0592-5099391
Fax:0592-5099319
ADD:Unit 2A, Lianchang Building, NO.6-8 Huli Avenue, Huli District,Xiamen,China.
www.stonediamondtool.com

- Details
-
Four steps to stained concrete floors
Source:www.stonediamondtool.com Date:2021/5/10 Read:516
Step 1
Clean the slab. This step is the most time consuming and is of utmost importance. The condition of the slab will determine what method you use to clean it. Remember, stain reacts with the concrete. Any other stains, liquids or products used during construction could have altered the concrete where the contact occurred. This can result in the stain not providing a uniform color.
In new construction, we normally have to clean glue, drywall joint compound and paint overspray from the slab. None of these substances penetrates the concrete; they just make cleaning more difficult. Pressure wash the concrete slab to clean it, using a mild cleaning solution. Again, remember that acid-based stain reacts with the concrete. Do not use acids or heavy abrasive cleaners. Glue can be removed with a chisel. Joint compound comes up easily when it’s wet. Sand off paint overspray with a sanding sponge.
Step 2
Apply the stain. First, tape the rosin paper along the bottom edge of the plastic that covers the walls. If the overspray from the stain hits the plastic, it rolls down and puddles on the concrete leaving a dark ring of stain. The rosin paper absorbs the stain and eliminates that problem. Make sure garage door tracks near the floor are covered. Acid and metal are not a good mix.
Use a plastic garden sprayer to apply the stain. Fill the sprayer with stain. You can dilute the stain with water up to a 50-50 mixture. Set the sprayer wand to a fine mist and carefully spray the floor. You will see what looks like smoke coming off the floor as you spray. This is the acid reacting with the concrete and is normal.
The first coat will not look like the finish color you want. It might look green or yellow. Don’t worry; it changes color as it dries. After you complete the first application, let it dry. Then apply a second coat to increase the intensity of the color and to cover areas you may have missed during the first application.
Step 3
When the stained concrete floors dry, clean the floor again. The stain leaves a powder-like residue that has to be removed from the floor. Use a commercial buffer with a scrubbing attachment to loosen the residue. Have someone vacuum up the water with a wet/dry vac as you work. This eliminates stain overflowing onto the driveway from the wash water. Let the floor dry.
Step 4
The final step is creating attractive, durable stained concrete floors is applying epoxy. Put two coats of epoxy over the stain. A quality epoxy is a two-part mixture consisting of epoxy and a hardener.
For an 800-square-foot garage, you’ll need a 5-gallon container of epoxy and 1 gallon of hardener. Since we need to apply two coats of epoxy, mix half of each of the ingredients in a 5-gallon container with a drill mixing attachment. Once it is thoroughly mixed, add a small amount of water, approximately a pint, to thin the epoxy to the consistency of tomato soup. Next, roll the epoxy on the floor with a medium-napped roller, rolling in one direction. When applying the second coat, roll the epoxy mixture across the floor perpendicular to the first coat.
With this technique, stained concrete floors will look like polished stone. Stain colors vary. We normally use two different colors, a combination of dark brown and black. These colors seem to best camouflage tire marks from hot tires. The marks will easily clean up, but are less noticeable between cleanings.

- News Reviews
- Popular Products
-
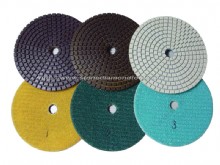
- 3 Step Polishing Pad (3SP_01)Clicks:64749
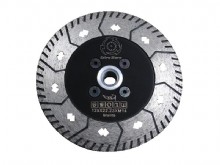
- CUTTING &GRINDING WHEELS (HN1Clicks:61939

- RCB resin copper bond polishinClicks:58243
- 3'' Metal Resin Transitional PClicks:34460
- Fickert Diamond Brush AB05DClicks:22110
- Aluminium Backer Pad BP01Clicks:19950
- Spiral yellow and green Wet PaClicks:19722
- Diamond wet dry core drill bitClicks:18904
- Products Categories
- Brazed Drill Bit Diamond Cutting Tools Diamond Saw Blade Diamond Small Blade Diamond Segment Diamond Wire Saw Electroplated Blade Multi Blades and Single Saws Diamond Polishing Tools Wet Polishing Pads Dry Polishing Pads Concrete Tooling Diamond Profile Wheel Polishing Drum wheel Abrasive Stone For Granite Abrasive Stone For Marble Backer Pads Grinding Discs Diamond Grinding Tools Sintered Cup Wheels Brazed cup wheels Profiling Router Bit Router Bits CNC Profile Wheels CNC Finger Bits Brazed Router Bits Diamond Core Drill Bit Diamond Core Drill Bit Vacuum Brazed Drill Bits Electroplated core bits Construction Core Drill Bit English drill and construstion Drill Dry Diamond Core Drill Bit Diamond Carving Tools Common Carving Tools High-speed Carving Tools Stone Profiler Machines Air Grinder Wet Grinder Angle Grinder Multi Function Wet Grinder Stone Router Machines Abrasive Brush Other Accessories Brush For Floor Series Diamond Brush Series Brush For Steel Wire Series Brush For Rutine Series Bush Hammer Plates Diamond Rollers The thick round Epoxy Floor Tools Microcement Tools STONE Product
- www.sssto.com | www.chinastonesuppliers.com | www.chinadiamondtool.com | www.chinatoolstore.com | diamond tools supply
- javascript:;
-
-
© 2009-2012 All rights reserved Support:www.zawl.cn
-